
Théo Sourget
Sunday, April 20, 2025 | 7 minutes
Create your own applications with Streamlit, FastAPI and Docker
During my projects, I like to build concrete applications from the research I conduct. I use them to demonstrate the capacity of a trained model or a pipeline I developed but also use the code in a more general purpose. To build these apps I use a combination of three tools: Streamlit, FastAPI, and Docker. In this post, I first show two examples of applications I’ve created, and then I present the tools with some simple examples of code.
Example of applications
UI for segmentation and generative models
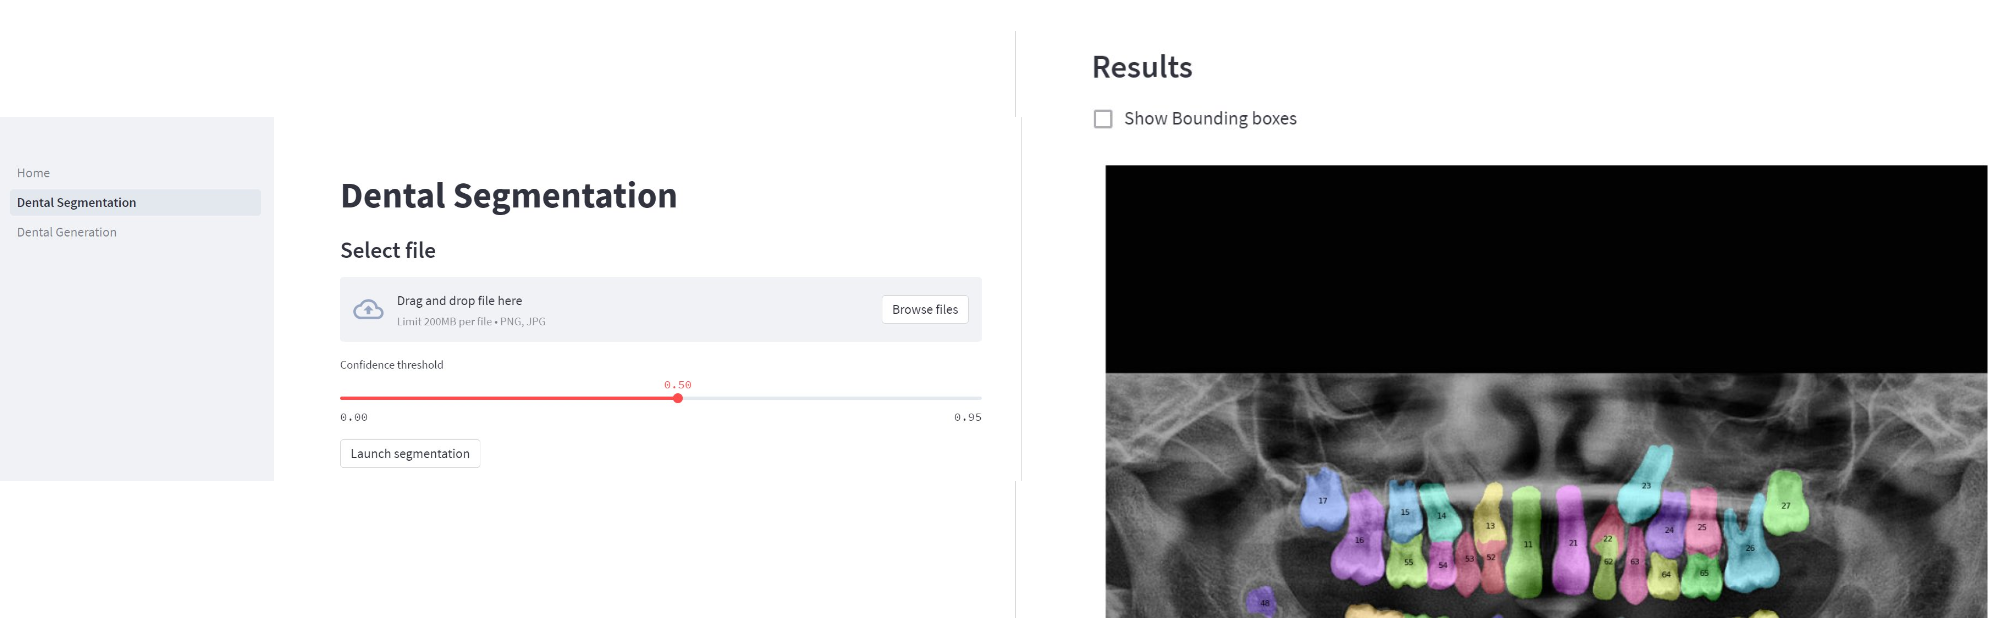
For this first example, I built an application to simplify the use of models trained to perform the segmentation of teeth in dental panoramics and to apply the first version of our algorithm to generate new panoramics, see more about this in our paper. I used this application during meetings with my supervisor as I believed it was better and easier than running classical Python scripts during demos.
The first component of the website lets the user upload a dental panoramic and decide the needed confidence for a pixel to be considered as a tooth. Then the model performs the segmentation when the user clicks on the “Launch segmentation” button.
In this project, we had access to a very limited amount of data. To mitigate this issue, we developed an algorithm to generate new panoramics based on the existing ones. The idea was to extract the teeth from the panoramics we had and add them to an empty one generated with an inpainting model. I developed an interface to let the user specify the teeth needed in the image as well as the age of the patient. As you can see in the image, it was the first version of the algorithm and the generated panoramics had some issues.

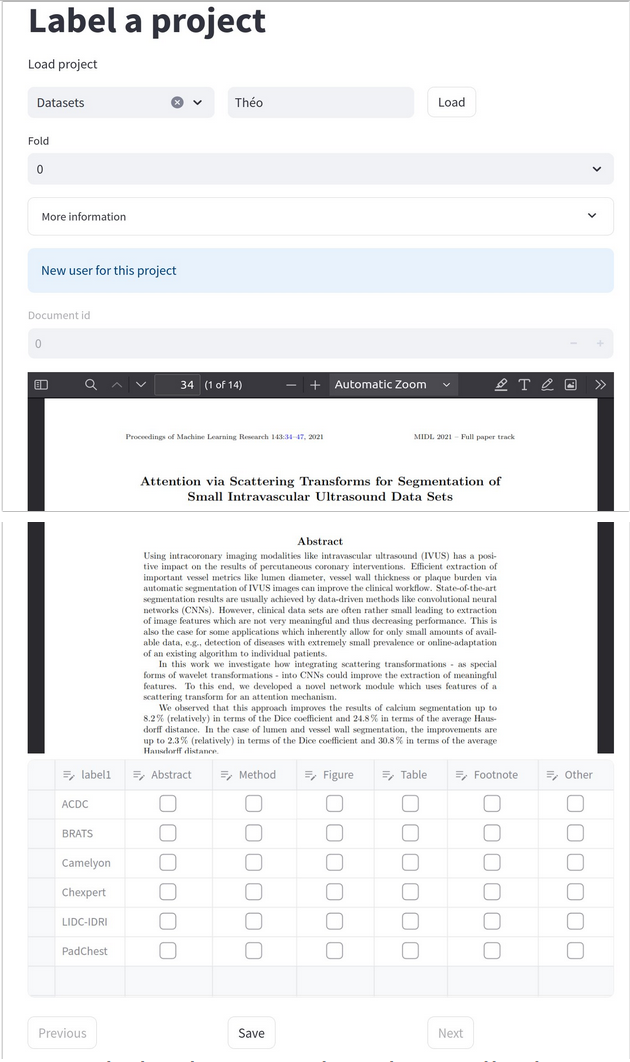
Annotation tool
The other example is an annotation tool for scientific papers. I already presented this tool in this previous blog post about my paper [Citation needed] Data usage and citation practices in medical imaging conferences. I built this app as other annotation tools didn’t meet my needs for annotating PDFs. This tool allows multiple annotators for the same files and keeps the PDF format. Moreover, we could also add the PDFs into different subgroups to ease the division of annotations among the annotators.
Presentation of the tools
I hope these two examples give you an idea of the wide range of applications you can create with these tools. I will now present them in a bit more detail.
Streamlit
Streamlit is an open-source Python library to build web applications. This library gives the possibility to data scientists to easily create applications from their data using Python code with access to usual libraries such as pandas, numpy and matplotlib.
Like any Python library, it can be installed easily with pip using the following commands (also creating a specific environment):
#Create the environment and install streamlit
conda create –n streamlit_demo python
conda activate streamlit_demo
pip install streamlit
#Test the installation, the page should be accessible at http://localhost:8501/
streamlit hello
Streamlit has multiple advantages, the first one is the very simple file structure compared to other libraries for web development in Python. For example, here is the file structure for the annotation tool I presented before without an API needed (you can also access the code here):
├── data
│   ├── DatasetPresence
│   │   ├── annotations
│   │   │   └── Théo.csv
│   │   ├── papers_info.csv
│   │   └── pdfs
│   │       └── file_0
│   └── projects_info.csv
├── Dockerfile
├── Home.py
├── pages
│   ├── 1_Create_A_Project.py
│   ├── 2_Label_A_Project.py
│   └── 3_Extract_Labels.py
├── README.md
└── requirements.txt
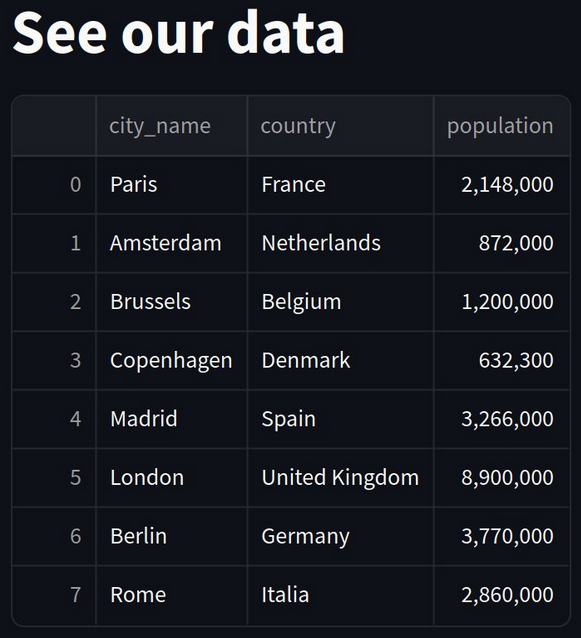
The main files are in the pages folder, they contain the code of your interface. This code can use any Python packages you may use in your analysis such as pandas or numpy but also some “magic commands” of Streamlit to display data. Similar to Jupyter notebooks, you can simply put the name of your variable and Streamlit will automatically render it on your page. You can for example use it to display your dataframe like this:
import streamlit as st
import pandas as pd

#Change the name of the tab in your browser
st.set_page_config(
    page_title("See our data")
)

st.title("See our data")
df_pop_per_capital = pd.read_csv("./res/pop_per_capital.csv")

#Use magic command to display the dataframe
df_pop_per_capital
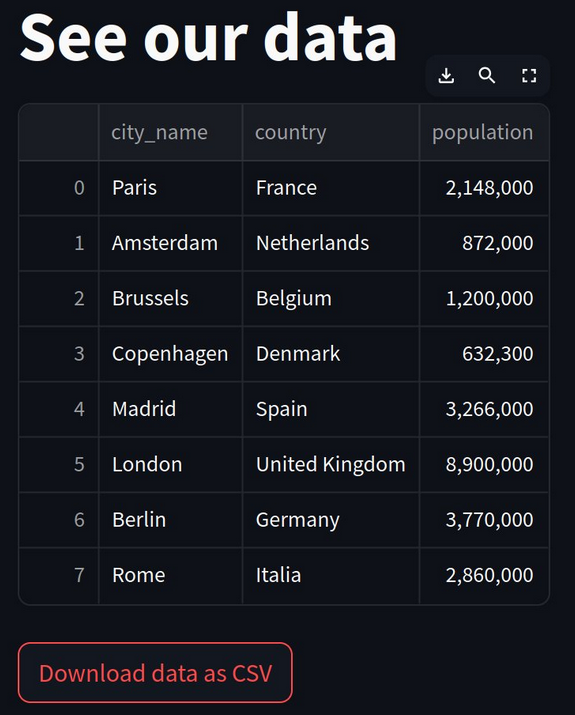
Of course some basic components such as button, checkbox or text input are already accessible with some functions provided by Streamlit. For example, we can add a button in our previous example to download the csv:
import streamlit as st
import pandas as pd

#Change the name of the tab in your browser
st.set_page_config(
    page_title("See our data")
)

st.title("See our data")
df_pop_per_capital = pd.read_csv("./res/pop_per_capital.csv")

#Button to download the dataframe
st.download_button(
    label="Download data as CSV",
    data=df_pop_per_capital,
    filename=f"df_pop_per_capital.csv",
    mime="text/csv"
)
Streamlit offers many more components and is updated very frequently to add new features. You can find more guides and information on the official Streamlit documentation but also many examples of Streamlit applications from the community here.
FastAPI
FastAPI is a Python library and as you may guess from its name it is used to build your own API. As Streamlit offers the possibility to use Python code it may be tempting to put everything in the same script, including data processing. However, for a better code and maintenance it is recommended to separate the code for the user interface (with Streamlit) and code handling the data which could also run your machine learning model (with FastAPI).
As for Streamlit the installation is very simple using pip:
#Install with
pip install fastapi uvicorn

#Launch the API (with a python script named main.py)
uvicorn main:app --host 0.0.0.0 --port 8000 –reload
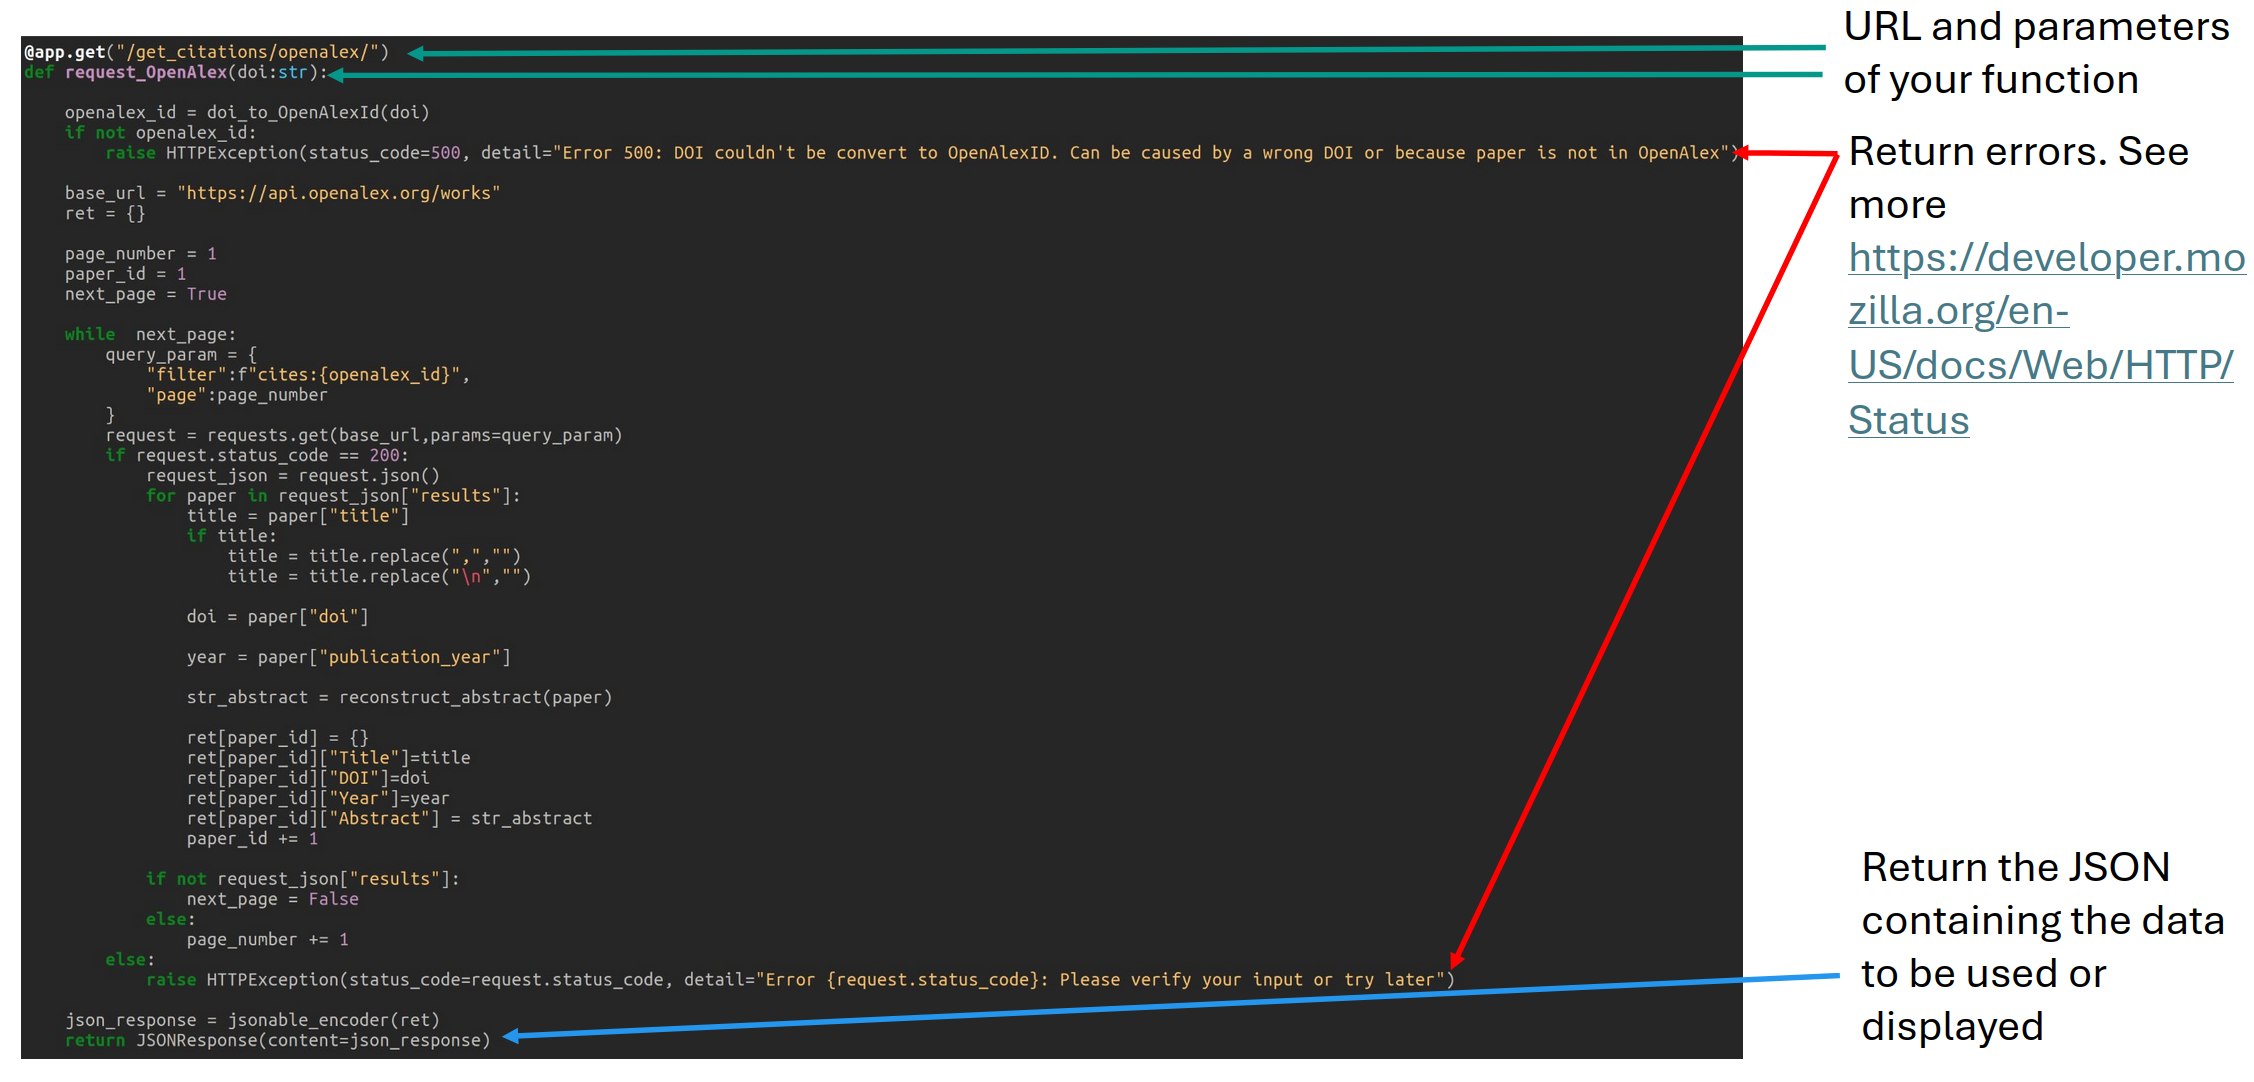
In your Python script, you will create functions which will be accessible through URLs as for any other API you may use in your project. Of course your API will contain code specific for your application but here is an example of a function with the main elements needed by FastAPI.
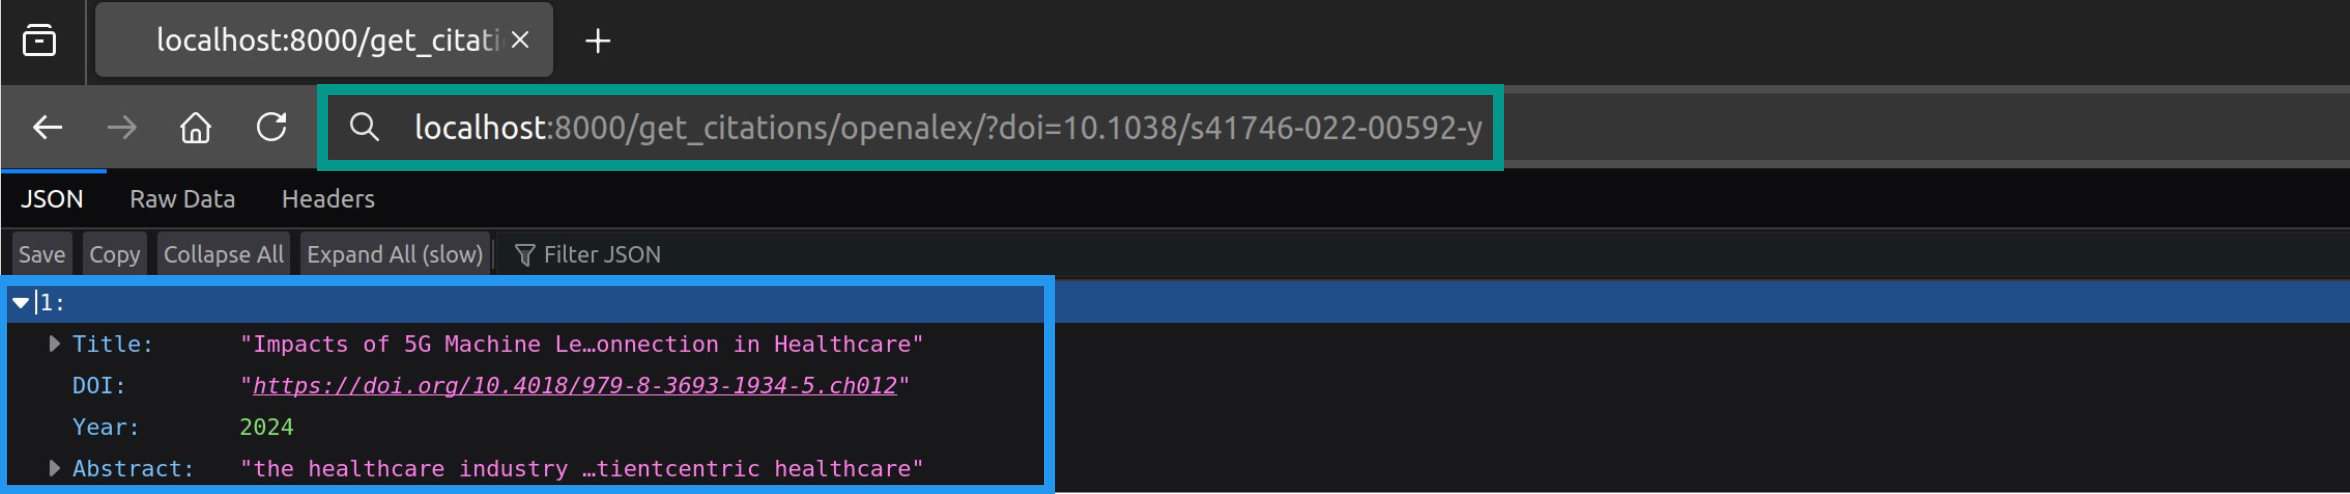
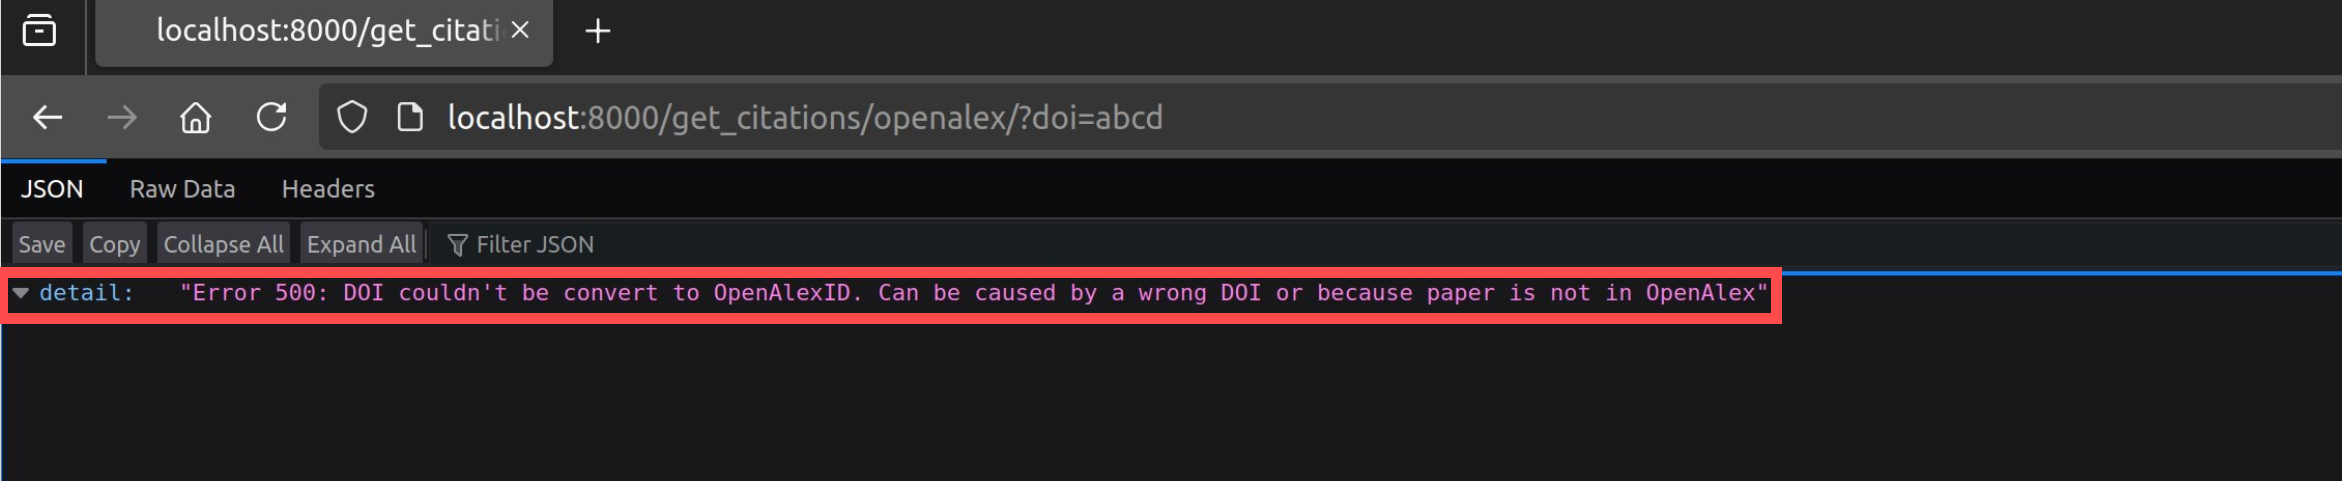
You can then use your API with the link you defined, you can even test it in your browser. For example, the previous code will return the first JSON if your request is valid or the second one in case of a bad parameter:
As for Streamlit, the idea of this blog post is to present quickly the tools, I encourage you to go check the FastAPI documentation to learn more about it and start building your own application.
Docker
Docker will finally ease the deployment and start of our application. Docker would need its entire blog post to be presented and many people have already written one, so I encourage you to go read one of them for a more detailed description. To summarize it, Docker will automate the deployment of your application launching both the Streamlit code and your API. For an example of a complete application with Docker, you can check one of my GitHub repository, it has the following file structure with the back folder containing the FastAPI script and the front folder containing the Streamlit application:
.
├── back
│   ├── Dockerfile
│   ├── main.py
│   ├── __pycache__
│   └── requirements.txt
├── docker-compose.yml
├── front
│   ├── Dockerfile
│   ├── Home.py
│   ├── pages
│   ├── requirements.txt
│   └── res
├── README.md
├── resources
│   ├── dataframe_result.png
│   ├── input_options.png
│   ├── keywords_research.png
│   └── statistics_display.png
└── utils
    └── get_concepts.py
With Docker you’ll first need to define your Dockerfile for your Streamlit application and your API. Here is a first example for Streamlit:
FROM python:3.10
COPY requirements.txt app/requirements.txt
WORKDIR /app
RUN pip install -r requirements.txt
COPY . /app
EXPOSE 8501
ENTRYPOINT ["streamlit","run"]
CMD ["Home.py"]
And a seconde one for FastAPI:
FROM python:3.10
COPY requirements.txt app/requirements.txt
WORKDIR /app
RUN pip install -r requirements.txt
COPY . /app
EXPOSE 8000
CMD ["uvicorn", "main:app", "--host", "0.0.0.0", "--port", "8000" , "--reload"]
Then your we’ll use docker-compose to combine the two with the following docker-compose.yml file:
version: "3.8"

services:
  frontend:
    build: front
    ports:
      - 8501:8501
    depends_on:
      - backend
    volumes:
        - ./front:/app

  backend:
    build: back
    ports:
      - 8000:8000
    volumes:
      - ./back:/app
Finally, you can launch your application with the command:
docker compose up -d --build
Note that using Docker will have an impact on the URL you have to call to access your API. For instance, with the previous example, as my API container is called backend I’ll use it in the URL to query my API instead of localhost like this:
url = f"http://backend:8000/get_citations/openalex/?doi={doi}"
request = requests.get(url)
Conclusive remarks
The objective of this blog post is not to give a complete tutorial for each tool but more to give you a first idea of their usage and advantages. I hope it motivated you to learn more about Streamlit, FastAPI and Docker and build your own applications. I really believe that building such applications can improve the quality of a demonstration but also give a new use to your research code with minimal efforts.